
In this tutorial, we are going to discuss Automation Anywhere And ChatGPT Integration which help you to integrate both of them. So now you can use ChatGPT features in Automation Anywhere with help of an API Key provided by ChatGPT. You can also refer to our previous integration with UiPath and Power Automate.
Here we will use RESET Web Service Action to connect both these. We also use API to make requests using POST Method.
What is Automation Anywhere
Automation Anywhere 360 is a complete RPA platform intended to automate manual, tedious, repetitive, and time-consuming operations across a large range of industries and applications.
This integration enables enterprises to use Automation Anywhere’s sophisticated RPA capabilities to automate repetitive operations and procedures, while simultaneously employing ChatGPT’s natural language processing capabilities to automate real-time customer care and support interactions. Automation Anywhere 360 and ChatGPT together provide a smart, conversational AI system that can increase process efficiency and customer experience.
What is ChatGPT
ChatGPT is a language model developed by OpenAI that can generate human-like text in response to a request. It has a variety of applications, including chatbots, automated writing, and content generation. ChatGPT’s effectiveness may be enhanced by tailoring it to specific tasks such as answering customer inquiries or developing marketing materials.
How to Integrate Automation Anywhere and ChatGPT
Now that you have a basic idea of both these, let us move to their integral part. In Automation Anywhere And ChatGPT Integration we use API keys that are provided by ChatGPT. To request a query from API we can use both POST and GET methods. But here we are using the POST method as it has more advantages than the GET Method. You need to follow each step below to integrate with any errors.
1. Generate API Key From OpenAI
Our first task is to generate an API key which is the soul of this integration. Before going to API generation you should have the following requirements satisfied else this integration is not possible.
- Automaton Anywhere Installed on your System
- A ChatGPT Account
If you have these then we can go to the integration part. Make sure to follow each step correctly without causing Errors.
- Go to the OpenAi API website to generate the required API Key. You can log in to your account or if you are new then create a new account.
- Now you can see a profile icon on the right side. Then click on the profile icon and a drop-down will open. Click on “View API Keys“, when you click this you can see the below page.
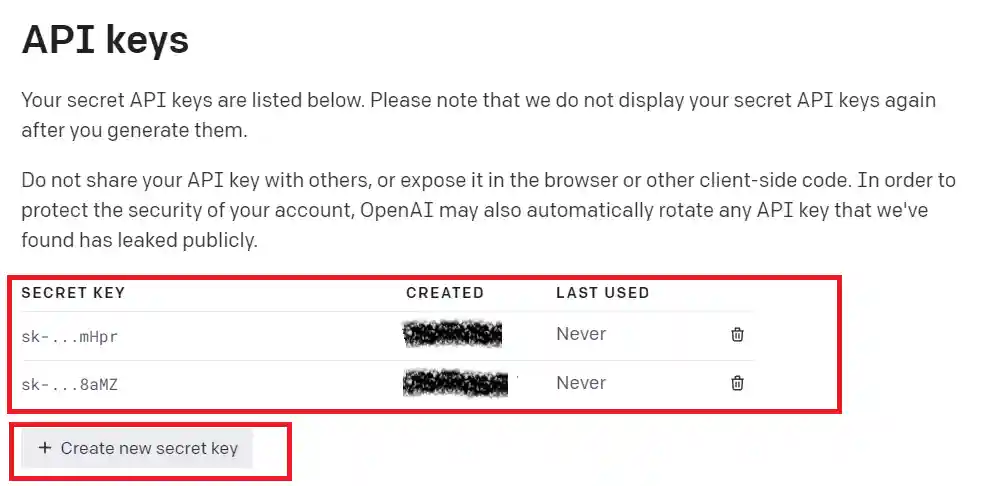
- You can click on “Create new secret key” or can use the existing key which you created earlier
Now our API generating part is completed. Now we have to connect this API key to our Automation Anywhere 36o.
2. Connect API key to Automation Anywhere
After generating the API key from OpenAI now we have to connect the API key, then only we can use the features of ChatGPT in Automation Anywhere. You need to follow the below steps without causing errors.
- Open your Automation anywhere application on your system. Create a new project or use the existing one for which you wish to perform this integration.
- Now on the left side, you can see a search box to search actions. It is the place where you can find all actions required for your automation.
- We will divide the complete integration parts into steps. So search for step action and add this to your workflow. You can set any name for your set. Here we use “User Input – RPA Tutorials“
- Now you have to add a “Prompt Action” to take input from the user. Search for it and drop into your workflow.

Once you have added this action, click on it now you can see a section to the right side where you can add variables to this action. Set Variable values as “Input_Value” and enter some random text in “Prompt window caption” and “Prompt Message“.
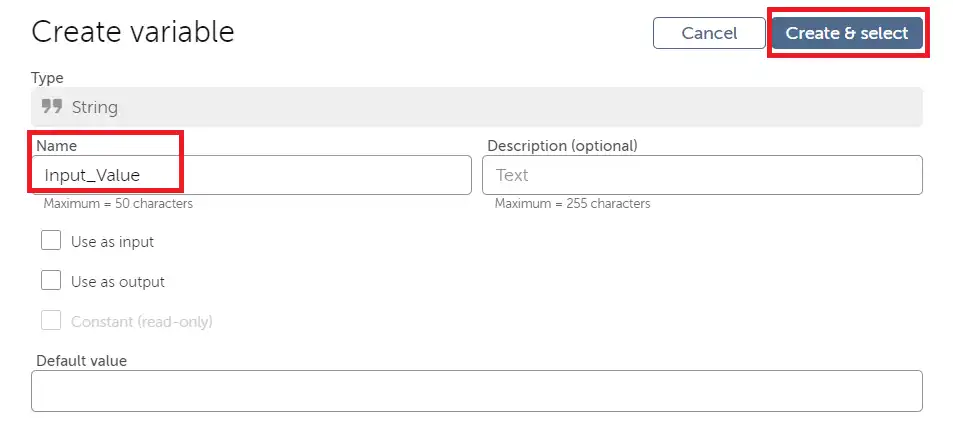
You can create variables by adding some random name in the Name field. Here we used “Input_Value” and select “create and select” to create a variable.
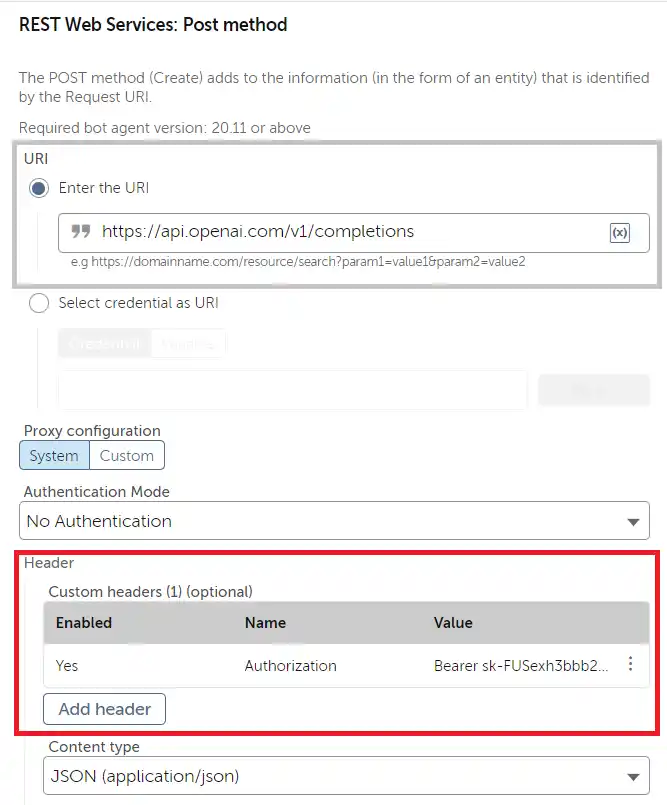
- Now Add another step action. In that steps add the “Rest Web Service” action to your workflow. Now you have to add values to the rest web service action.
Enter the URI: https://api.openai.com/v1/completions
Headers
Name: Authorization
value: Bearer <Your Copied API Key>   Eg: Bearer sk-qaqfasfaefafawfafawefafdafaw
Content Type: JSON (appllication/json)
To create a Header click on “Add Header” and add values in name, values, and content type.
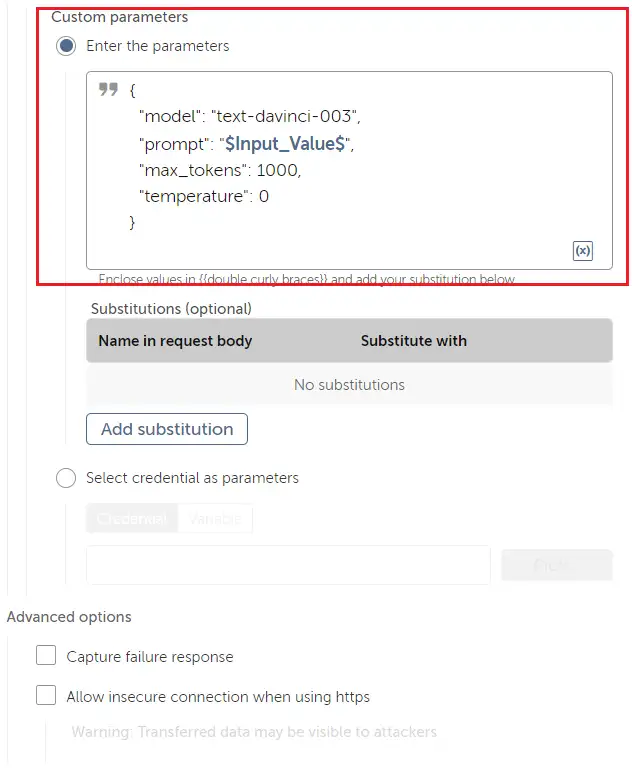
Now you have to add Custom parameters. Add the below code inside the custom parameters.
Enter the parameters:
{
  "model": "text-davinci-003",
  "prompt": "$Input_Value$",
  "max_tokens": 1000,
  "temperature": 0
}
Now you have to add Mapped Variables or Dictionary. Click on “Add Variable Mapping” and on Key and map to variable add the below code.
Key: Body
Map to variable: Str_Body
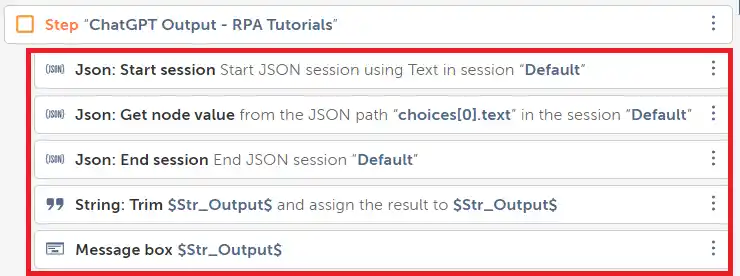
- Now Add another (3rd) step. In this step, we will add the below actions, such as “Start Session“, “Get Node Value“, “End Session“, “String Trim” and “Message Box
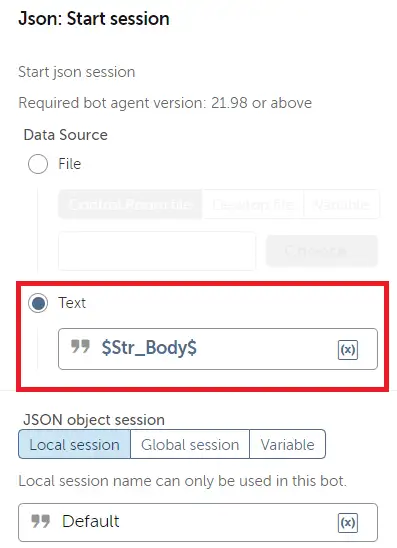
- Now drag and drop Json: “Start Session action” to workflow and Set text value as “$Str_Body$” in this action. Keep all others as default.
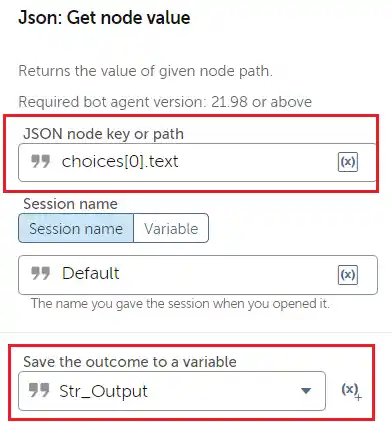
- Now Add the “Get Node Value” action to your workflow. and Set JSON node key or path as “choices[0].text” and set Save the outcome to a variable as “Str_Output“.
- Now Search for “End Session” Action and add this to your workflow. The main purpose of using a start and end session between “Get Node Value” is that when you request a query using API, by default the value will be in JSON format which is not much human friendly, so we convert it to normal text format.
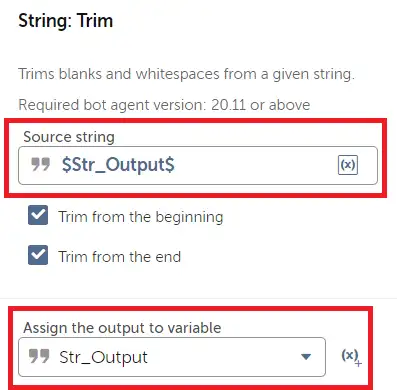
- Now search for “Trim” and add it to your workflow. This action will help you to remove the whitespace and blanks of a given string. Set the Source string as “Str_Output” and Assign the output to a variable as “Str_Outptut”
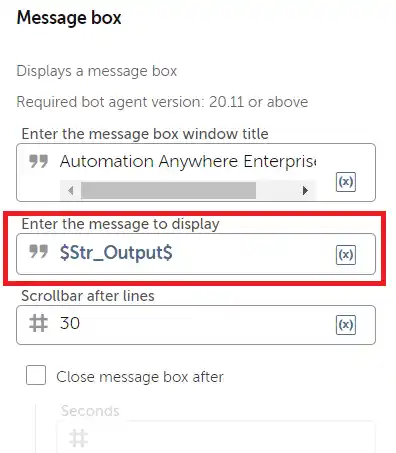
- Now search for the “Message Box” action and add it to your workflow. Set the value for Save the outcome to a variable as ” Str_Output“. The message box is used to show the result or output of the query which is affected from chatgpt using API
- Now we have completed our integration. your workflow and run the process.
3. Result of Automation Anywhere And ChatGPT Integration
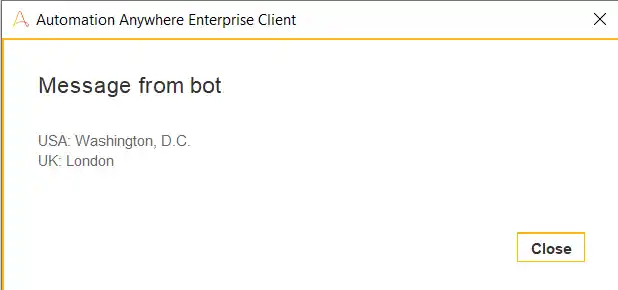
Once you run the workflow of your integration after executing, it will ask you to type a question in the text field and type the question which you wish to know.
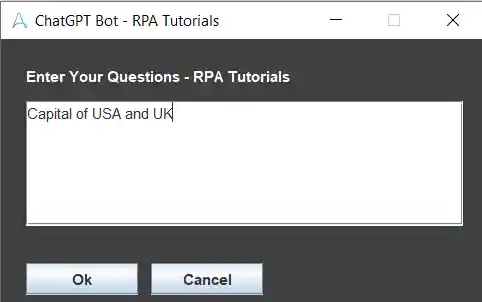
You have to type the question and click on the “ok” button. Now using the POST method will help you connect with ChatGPT with the help of the API Key provided by you and fetches the result and display it on the message box.
Additionally, we are providing the complete workflow in form of an image below. If you have any doubt you can refer to this. If you have any problems or errors while using this integration, you can ask in the comment section.
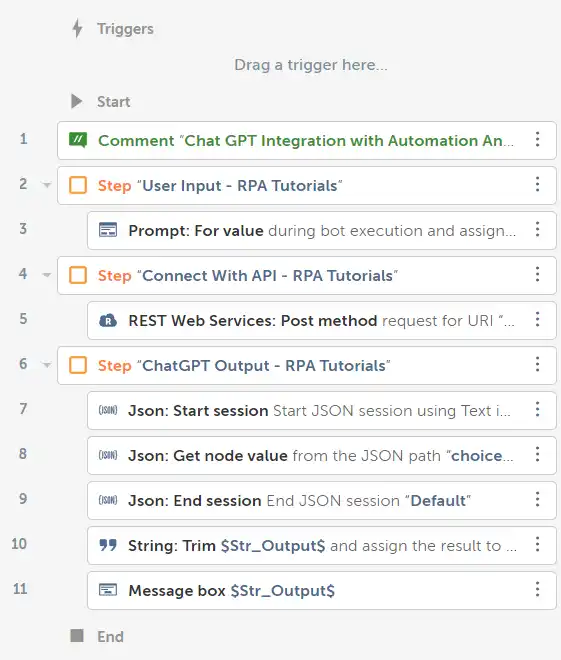
You can refer to the above workflow. All the actions are placed inside the Start and End Actions.
Conclusion
Here we have completed Automation Anywhere and ChatGPT Integration. With the help of this integration now you can directly use ChatGPT in Automation Anywhere with the help of API. Here we have just provided a sample use case for this integration. There are multiple other use cases all use cases have the same initial steps.
You can also try other use cases of Automation Anywhere And ChatGPT Integration. You can also use this in your Automation workflow to check errors and much more.